Nano Banana Use Cases & Tutorial | Part 2
Image2Video Tutorial & 10 Prompts
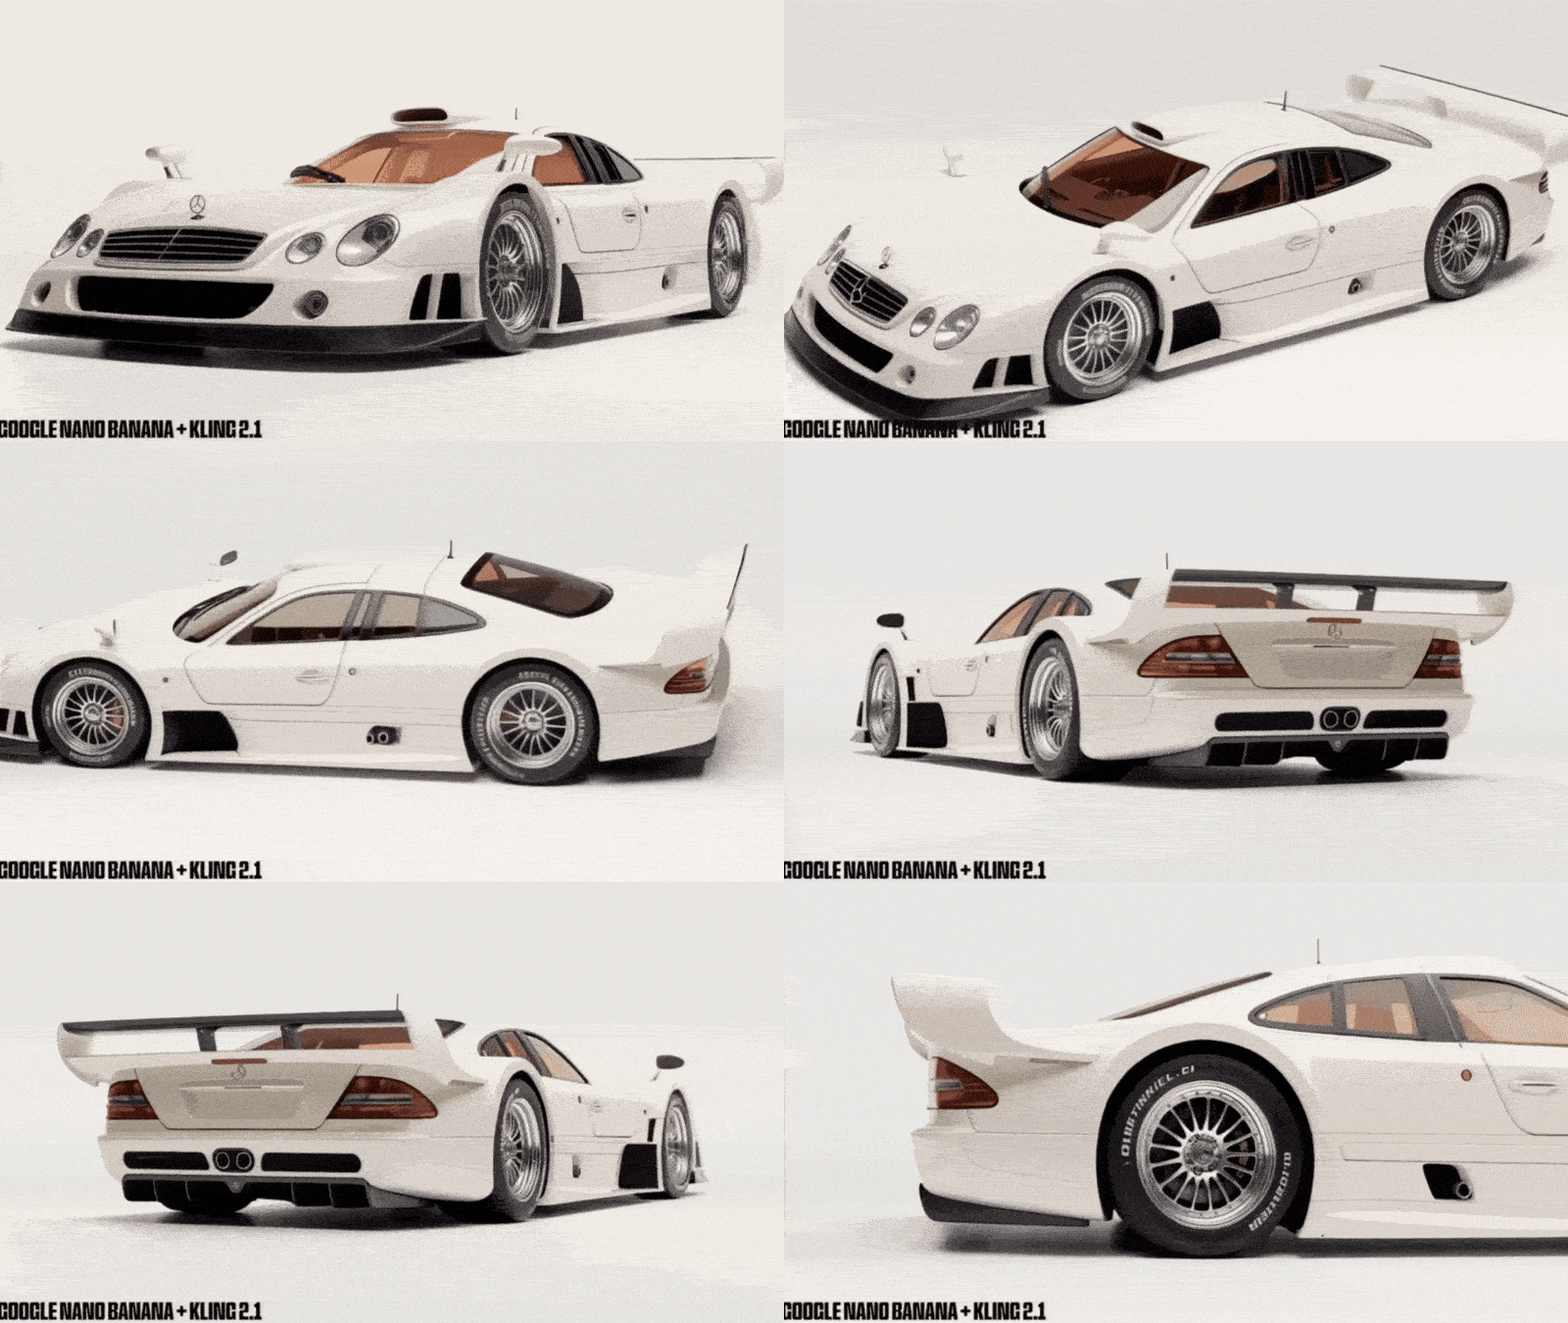
Hey
In our last edition we explored use cases and capabilities of Nano Banana. Check it if you missed:
Today, we want to walk you through a more advanced workflow that shows Nano Banana’s multi-image powers in action. Also we are going to offer you our 10 Prompts that unlock potential of Nano Banana! Let’s go
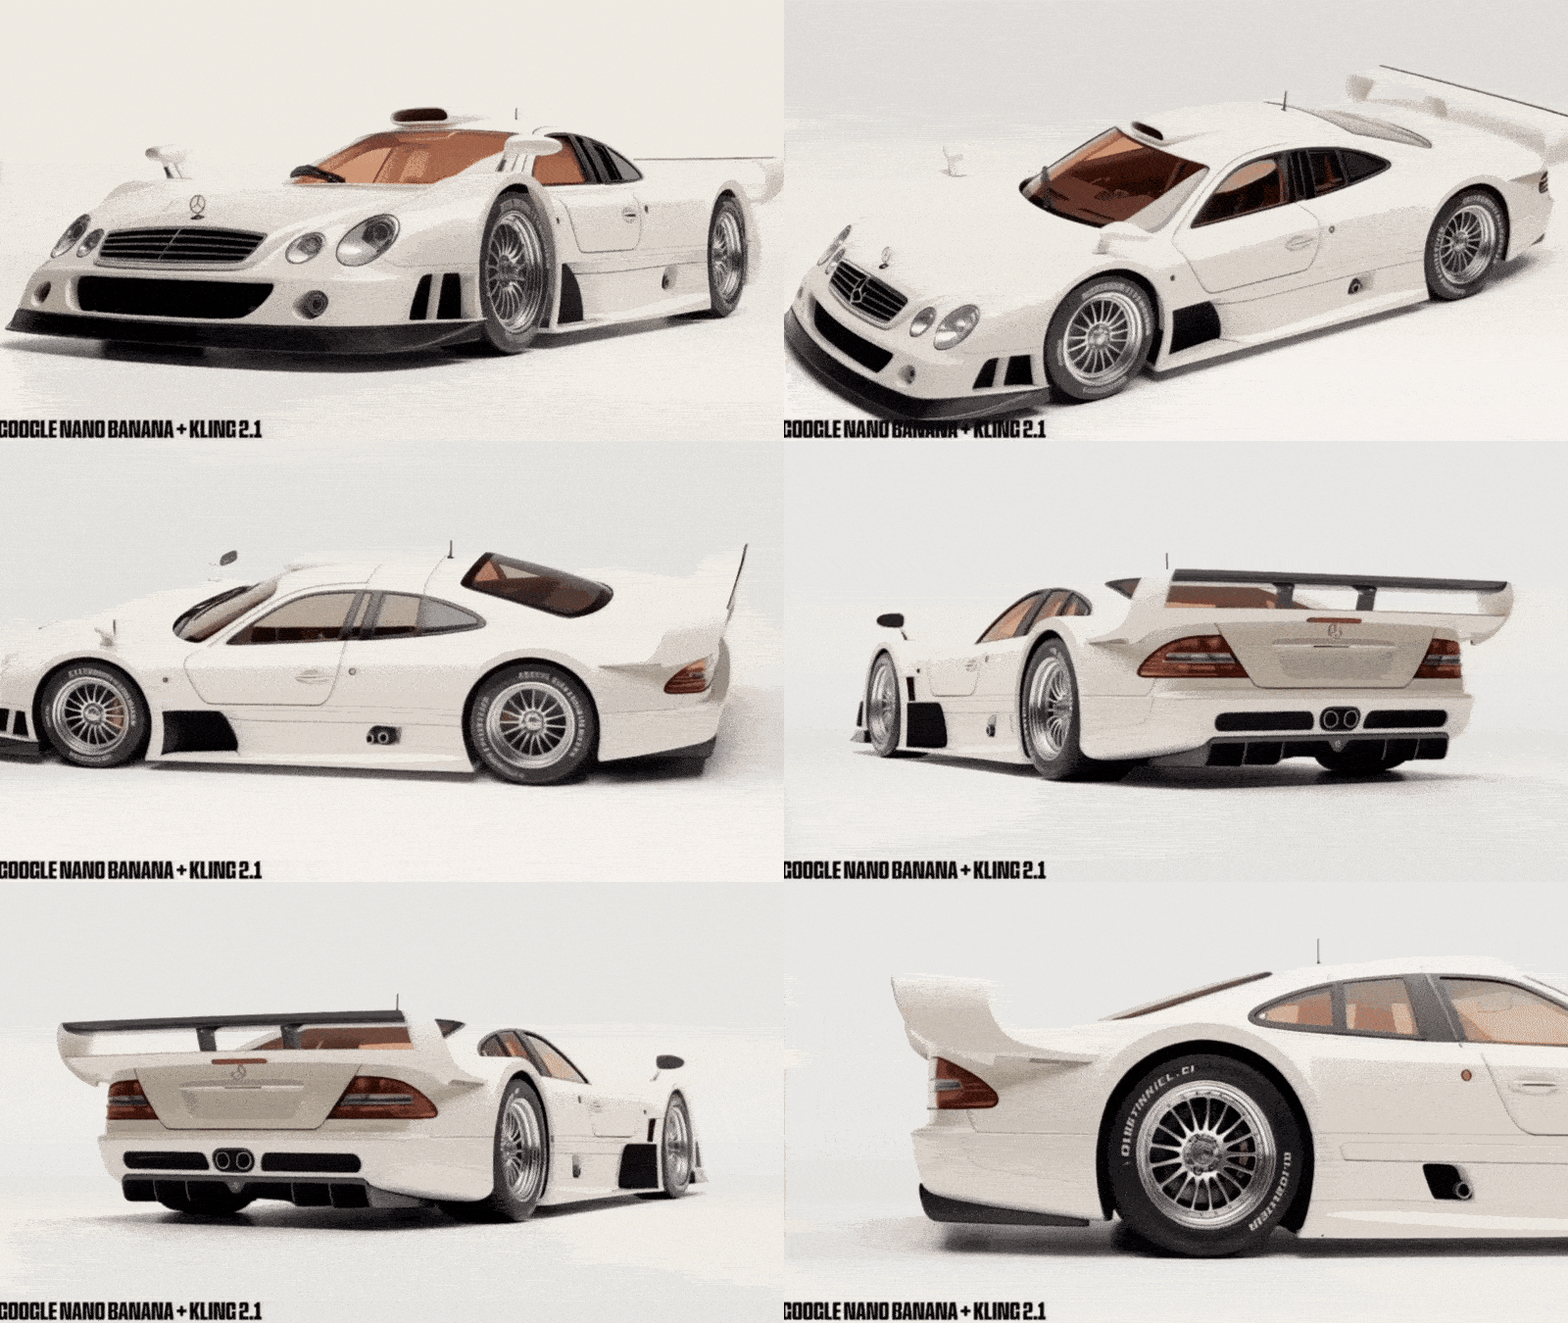
today we learn how to make similar videos
Consistent Product Shots with Nano Banana
The following example comes from Rory Flynn’s demonstration of a batch generation pipeline using Nano Banana together with Weavy and Kling 2.1. It went viral on X and we can’t miss it!
Here’s the full process, step by step:
##### Step 1 – Upload Base Image
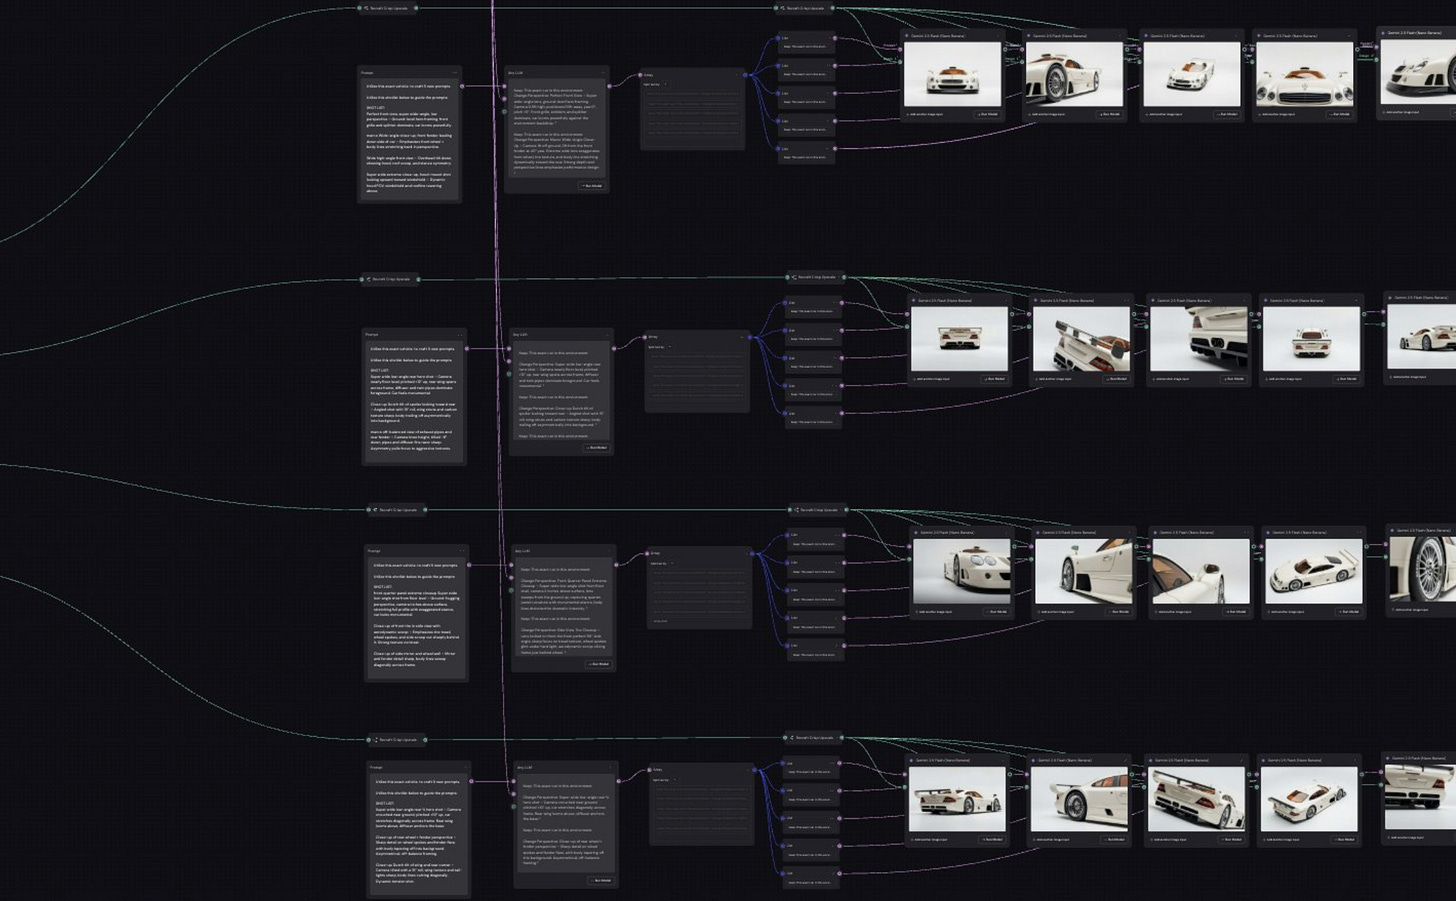
Start with a single image of your subject (in Rory’s case, a white Mercedes-Benz CLK GTR). From that, Nano Banana generates three additional reference views: side, rear, and rear ¾. That gives you the foundation for 360° consistency.
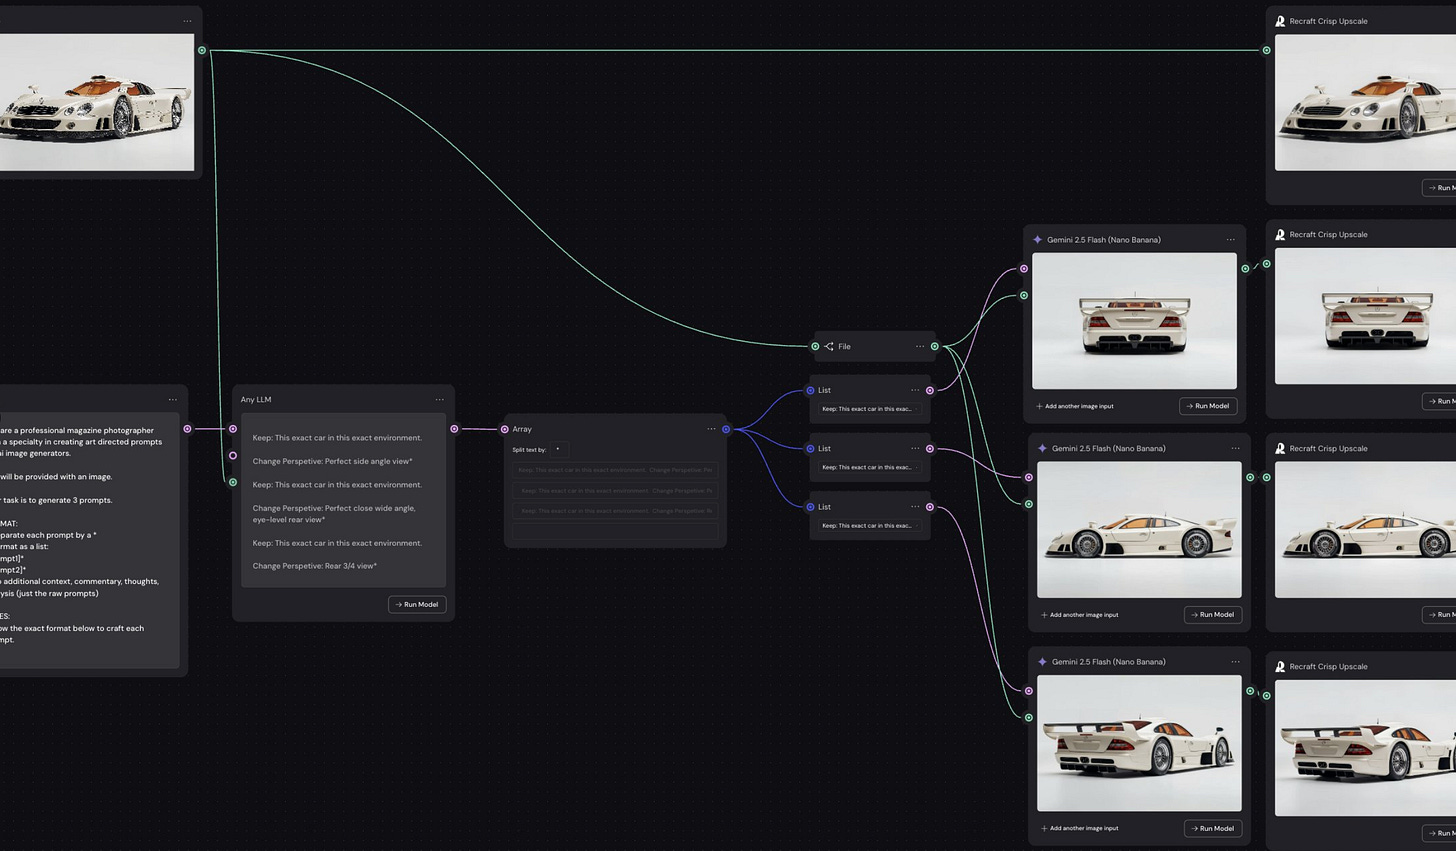
##### Step 2 – Iterate Shots
Each reference image is routed through Nano Banana “nodes” with a system prompt guiding shot structure. For example: Keep: This exact car in this exact environment. Change Perspective: Perfect front view, ultra wide-angle, close-up low perspective (camera at ground level, 2ft away, tilted upward 20°).
This ensures the subject stays locked while you explore dramatic new compositions.
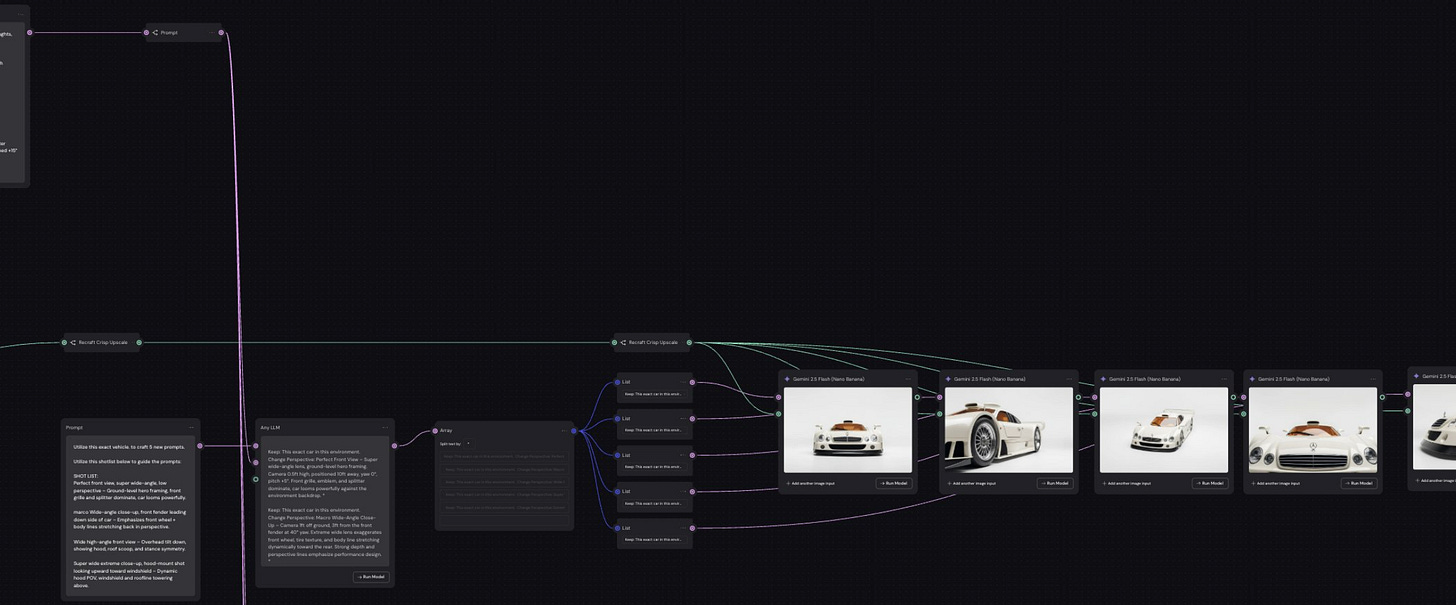
Step 3 – Duplicate + Scale Repeat the process for each angle. In practice, you’ll generate ~5 consistent images per view (front, rear, side, ¾). The key here is that every iteration inherits the subject fidelity from the base images, so details like proportions and features never drift.
##### Step 4 – Sequence with Kling 2.1
Once you have your stills, you can turn them into motion. Using Kling 2.1, each still image becomes a keyframe in a cinematic sequence. Because the underlying images are consistent, the motion between angles feels smooth and stable—like a professional car commercial shot with dolly rigs.
The result? A professional-grade, camera-consistent animation pipeline that starts with just one image. This workflow shows why multi-image consistency isn’t just a “nice to have”, it’s the backbone for scaling creative projects.
watch the full demo of this project here
With that foundation in place, let’s move to something just as important: how to actually optimize your prompts so you can get the best results every time.
Share it with friends who is editing & generating images!
Unlock the Full Power of Nano Banana with Prompts
Good prompts are the key to good results. Following official prompting guide recommendations will dramatically improve your outputs.
Basic Prompting Rules
Layer your prompts for better results. Structure your requests in layers, starting with the main action, then adding style details, and finishing with technical specifications. For example: "Change the background to a beach scene" (main action) + "with a dramatic sunset sky" (style) + "keeping my outfit and pose exactly the same" (consistency note).
Use Professional language when it matters. Don't be afraid to use technical terms that convey exactly what you want. Photography terms like "shallow depth of field," "rim lighting," or "macro detail" can dramatically improve your results. Design vocabulary like "minimalist aesthetic" or "vintage color grading" helps the AI understand your artistic direction
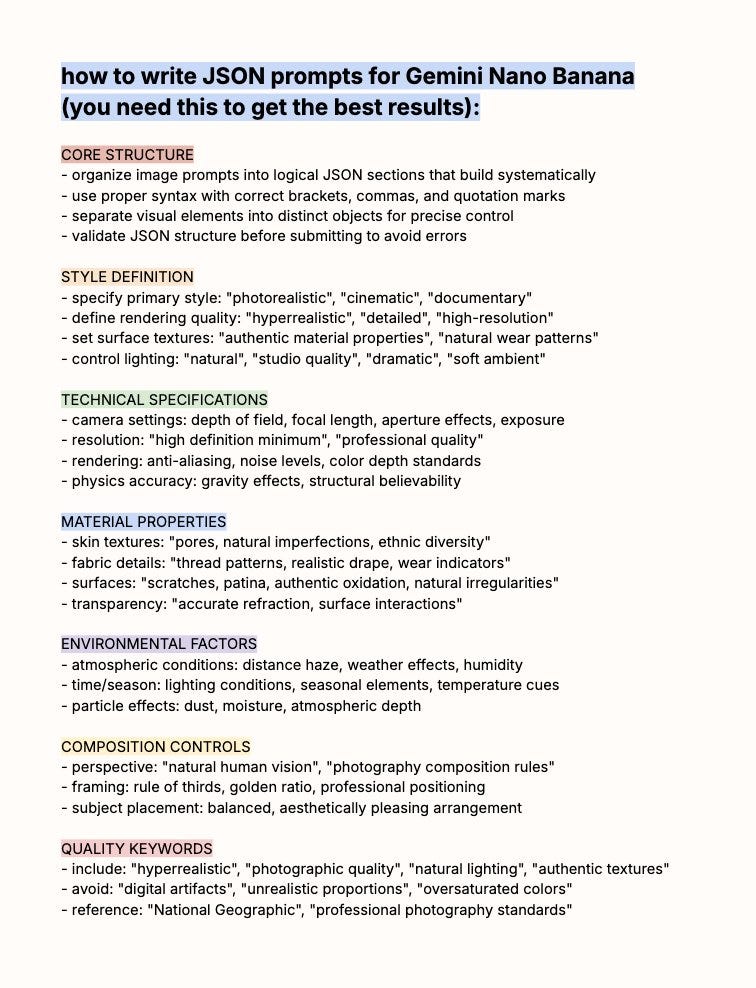
JSON Prompts Tutorial:
10 Handpicked Prompts (found in r/CreatorsAI) :
🍌 01-Outfit Swap
Change the outfits of these two characters into bananas🍌 02-Sketch Rendering
Render the sketch as a colorful 3D cartoon car with smooth shading.🍌 03-9-Grid Image
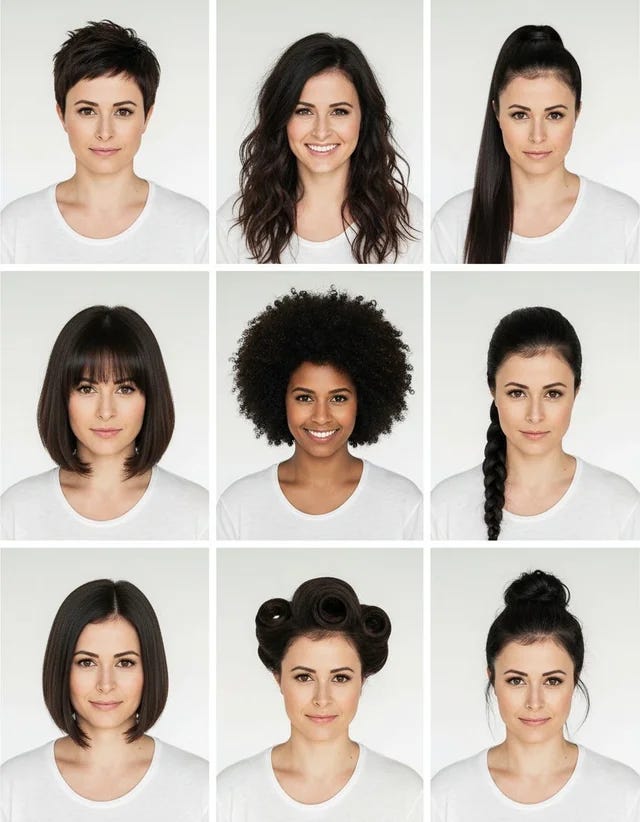
One input → 9 different ID-style photos.🍌 04-Effortless Background Removal
Remove the person wearing black from the image.🍌 05-Powerful Multi-Image Fusion
A man is standing in a modern electronic store analyzing a digital camera. He is wearing a watch. On the table in front of him are sunglasses, headphones on a stand, a shoe, a helmet and a sneaker, a white sneaker and a black sneaker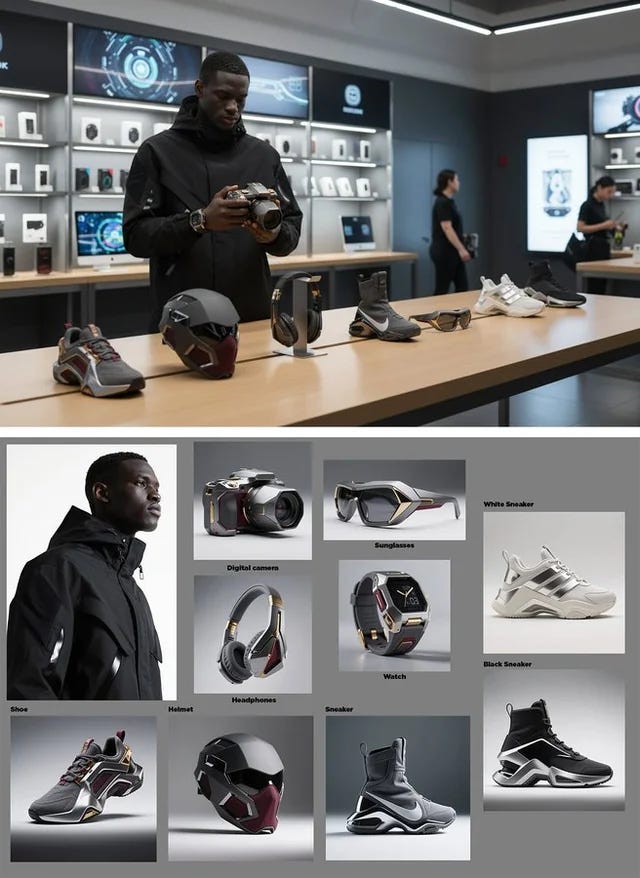
🍌 06-Four-View Character Turnaround
Create a four-panel turnaround for this man to show his frontal, his right side, his left side and his back, in a white and grey back ground.🍌 07-ID Photo Generation
Generate a portrait photo that can be used as a business headshot.🍌 08-Create Advertising Posters
Use the original uploaded photo as the base. Keep the young woman in the red T-shirt, her natural smile, and the sunlight exactly the same. Transform the picture into a Coca-Cola style advertisement by adding subtle Coca-Cola branding, logo placement, vibrant red highlights, and refreshing summer vibes, while preserving the original image content.🍌 09-Restore Old Photos
Restore and colorize the image so that everything is colorful (consistently) but still feels cinematic. Lots of color. It looks like a modern (high-quality) Leica photograph.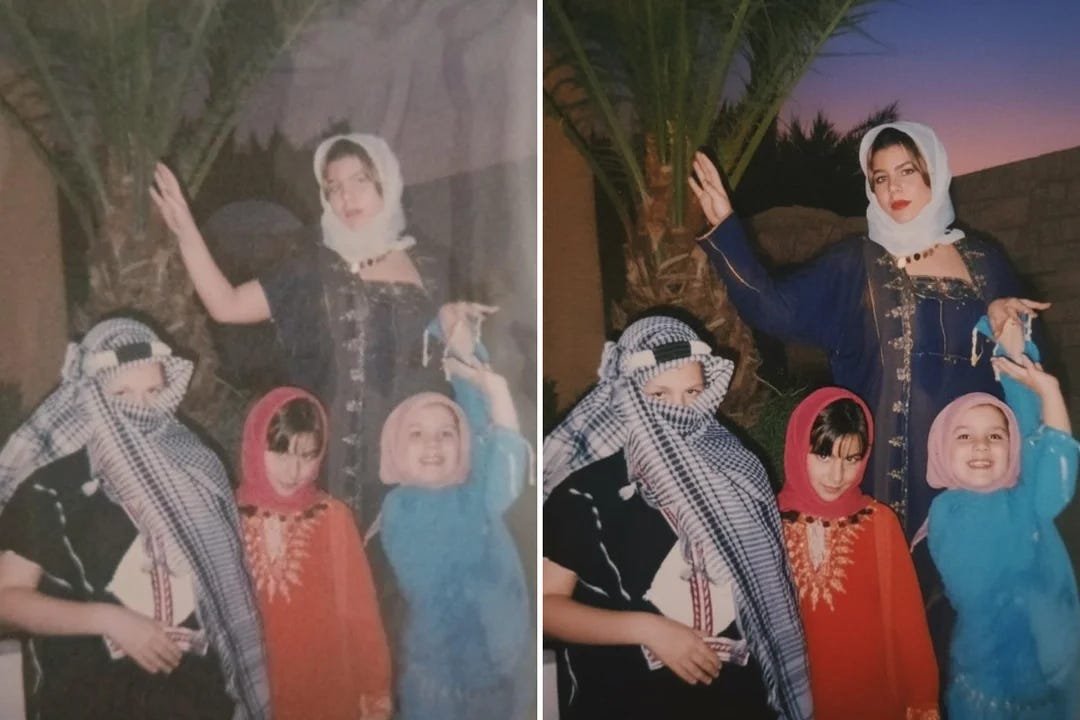
🍌 10-Annotate Image Information
You are a location-based AR experience generator. highlight [point of interest] in this image and annotate relevant information about it.Conclusion and Next Steps
And there you have it! You now have everything you need to start creating amazing visuals with Nano Banana. Remember, mastering this tool is all about experimentation and practice, don't expect perfection on your first try, but don't be surprised when you create something that genuinely amazes you.
Here are some resources you can follow to continue your Nano Banana journey and stay updated with the latest developments in AI image generation.
Don’t forget to share the post with people who are into creative work with images & visuals
This article was first published in the Creators AI newsletter. View the original edition.